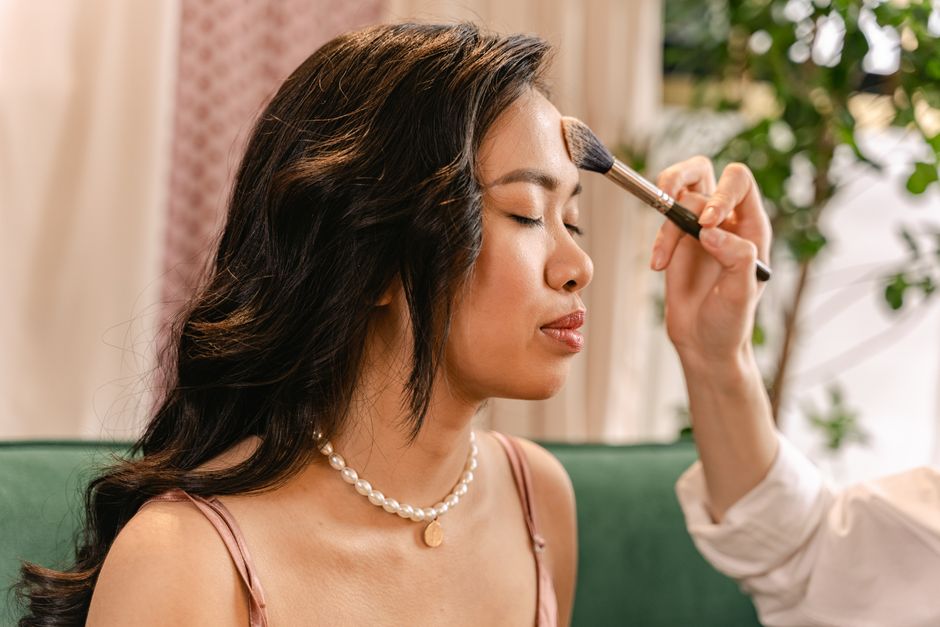
Everyday Makeup for Short Days: Warm Tones and Soft Finishes
Want your everyday makeup to look awake when the sun disappears before dinner? The best answer is not a heavier base or a full eye look. Use warm color, controlled shine, and thin layers that still look like skin under gray daylight, office LEDs, and evening lamps.
Why warm tones suit short-day makeup

Low daylight makes cool color look flatter
Short days change the way makeup reads. Blue winter daylight can drain pink, gray, and icy beige shades until they look pale on the face. Indoor lighting creates a different problem: overhead bulbs can make cool shadows look green or dull. Warm tones add the small amount of yellow, peach, terracotta, or soft brown that the face loses in those settings. That does not mean using orange blush or copper everywhere. The strongest result comes from small temperature shifts, such as a peach-beige lid, caramel brown liner, or muted apricot cheek.
Warm does not mean dark or dramatic
The goal is visual warmth, not intensity. Choose colors one step richer than your natural skin tone, then keep the finish sheer. A warm rose blush works on fair skin when applied lightly. Cinnamon, bronze, and toasted brown suit medium and deep skin when they retain some transparency. Soft warmth works because it restores contrast without creating a hard edge. Keep the darkest color close to the lash line and place the brightest warmth at the center of the face, where short-day lighting tends to lose definition.
Choose a soft finish before choosing more coverage

The four-sentence verdict
For short-day makeup, a soft satin finish is the safest choice because it reflects enough light to keep the face fresh without showing every dry patch. A fully matte base can look flat under weak daylight, while a wet-looking base may turn uneven around the nose, chin, and forehead after several hours. Start with a thin layer of coverage only where redness or shadow needs it, then leave the cheeks, temples, and outer forehead close to bare skin. If the result looks dull, add warmth with blush or bronzer instead of adding a second layer of foundation.
The texture test
Test your base near a window and under the lighting you actually face during the day. Look for a surface that stays smooth when you smile and does not collect in the crease beside the nose. Cream and liquid formulas usually blend more naturally over dry winter skin, but a light powder through the center of the face prevents shine from overpowering the softer look. The best finish is the one that still looks even after six hours, not the one that looks most polished during the first five minutes.
Build a ten-minute routine that survives changing light

Use this order
- Prep for two minutes. Apply moisturizer to dry areas and wait at least three minutes before makeup. Press away excess slip with a tissue.
- Even the center of the face. Use a small amount of base around the nose, mouth, and inner cheeks. Leave the outer face lighter.
- Correct only visible shadows. Tap concealer under the inner eye and beside the nose. Do not spread a thick layer across the whole cheek.
- Warm the eyes with one matte shade. Sweep a soft tan, peach-brown, or muted caramel through the crease and lower lash line.
- Add a close-to-the-lashes line. Brown pencil gives definition with less hardness than black. Smudge the outer third before it sets.
- Place blush high on the cheek. Start with one small tap, blend toward the temple, and add a second layer only if the color disappears.
- Finish the lips softly. Use a warm rose, cinnamon nude, or sheer terracotta balm. Blot once so the color stays lived-in.
Check the result before leaving
Turn your face toward a window, then check it under a ceiling light. If the eyes look heavy, soften the lower lash line. If the face looks gray, add a little peach or warm rose to the cheeks. If the skin looks shiny rather than softly lit, powder only the sides of the nose, center forehead, and chin. This three-point check takes less than a minute and prevents the most common short-day mistake: adding more makeup when the real issue is poor color balance.
Which warm color pairings stay balanced?
Should warm eyes use warm blush?
Yes, but the colors should not match exactly. Pair a muted bronze or caramel eye with a peach-rose cheek. The slight difference keeps the face dimensional. A fully orange eye, orange cheek, and orange lip can make the skin look flushed rather than polished. For a neutral outfit, warm brown eyes with apricot blush create enough color without competing with clothing.
What works with pink or red clothing?
Use warm rose or soft terracotta rather than bright coral. These shades connect with red and pink clothes without copying them. Keep the eye makeup quiet: a beige lid, brown mascara, and a small amount of golden brown at the outer corner. The face will look coordinated, but the makeup will not become another bold accessory.
How can deeper skin tones keep warmth visible?
Choose pigments that do not turn gray after blending. Burnt peach, cinnamon, copper-brown, brick rose, and warm berry usually retain their character better than pale beige. Place blush slightly higher and use a denser brush for the first layer, then soften the edges with a clean fluffy brush. The goal is not maximum saturation. It is a clear warm veil that remains visible in low light.
Three products that earn a place in a short-day kit
A useful shortlist, not a full collection
You do not need a large bag for this look. These three formulas cover the main jobs: softening the complexion, adding warm cheek color, and creating a blurred finish. Prices are listed US prices and can change, but the product roles remain useful.
| Product | Listed price | Useful specification | Best use |
|---|---|---|---|
| e.l.f. Halo Glow Liquid Filter | $15 | 15 flexible shades; light coverage; luminous soft-focus finish; four ways to wear | Mix one pump with base or tap over cheekbones when skin looks dull |
| Milani Baked Blush in Luminoso | $12.99 | Pressed baked powder; warm luminous peach tone | Use a small amount high on the cheek for a quick warm flush |
| MAC Glow Play Cushiony Lightweight Buildable Blush | $34 | Buildable blurring texture; 10 shades | Choose a warm rose or peach shade when powder looks too dry |
The clear pick
For most people, the Milani Baked Blush in Luminoso is the best value because it adds warmth quickly and costs less than a full lunch. Pick the MAC Glow Play formula if your cheeks show dry texture and you prefer a cushiony finish. Choose the e.l.f. Halo Glow Liquid Filter only when the skin needs extra light; it is not a replacement for coverage, and applying it across an oily forehead can make the face look too reflective.
Mistakes that make warm makeup look muddy
The strongest opinion
The biggest mistake is treating warmth as a color problem when it is usually a placement problem. Adding more bronzer rarely fixes a face that looks tired. It often creates a brown veil that hides the natural structure of the cheeks and eyes.
- Do not use one warm shade everywhere. Balance a warm eye with a slightly rosier cheek and a neutral lip.
- Do not place blush too low. Color below the center of the cheek can pull the face down, especially under overhead light.
- Do not skip the neck check. A warm base may look attractive on the face but too yellow against the neck. Sheer the edges instead of adding more foundation.
- Do not powder the whole face automatically. Set only areas that crease or become shiny. Powder can erase the soft finish you worked to create.
- Do not stack shimmer over texture. A glossy cheekbone will emphasize bumps, pores, and dry patches if the underlying skin is uneven.
- Do not use black liner as the default. Brown, espresso, or deep plum gives definition with a softer transition into warm eyeshadow.
When to stop adjusting
Step away after one correction round. Makeup often looks stronger up close than it does at normal conversation distance. If the face has an even center, visible cheek color, and a defined lash line, the routine is finished. More product usually adds weight, not polish.
When to skip extra glow and keep the finish soft
Choose satin over shine for long indoor days
If you will spend most of the day under office lights, travel in a heated room, or wear a mask, skip a high-shine base. Friction and dry air can break reflective products into uneven patches. Use a thin satin base, cream blush set lightly with powder, and a balm-like lip color. This combination keeps the face comfortable and fresh without asking one glowing product to carry the entire look.
Choose less makeup when the skin is already flushed
Cold air can redden the nose and cheeks, so extra warm color may make the face look overheated. Neutralize only the strongest redness, then use a muted rose rather than bright peach. If the eyes are watery, keep liner close to the upper lashes and avoid heavy lower-lash color. For dry or textured skin, the best everyday makeup for short days is a thin satin base, warm rose blush, soft brown eyes, and a sheer terracotta lip. That combination gives the face definition without fighting the light.
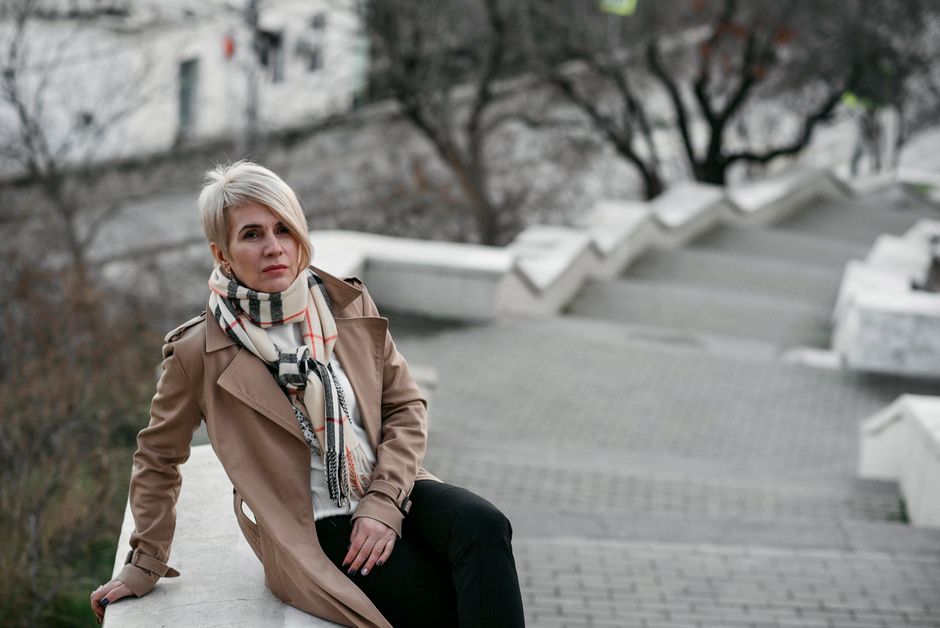
How to Style a Trench Coat in Autumn and Winter
At 7:40 on a cold October morning, your outfit looks fine indoors but fails the moment you step outside: the sweater bunches under the coat, the belt hangs loose, and your shoes cannot handle wet pavement. The fix is not another scarf or a larger size. It is a planned balance of insulation, proportion, and weather protection.
Start with the layers, not the trench coat
Build warmth from thin layers
My verdict: The most reliable autumn and winter trench outfit starts with a close-fitting base layer, a mid-weight knit, and enough room in the coat for both without pulling across the shoulders; a fine merino turtleneck under a cotton shirt gives more usable warmth than one oversized sweater because trapped air between layers insulates your body while the shirt keeps the neckline neat.
Keep the outline clean
Choose one loose piece at a time: pair a relaxed trench with straight-leg trousers, or wear a roomy knit with a neater coat, because oversized clothing at every layer creates bulk at the waist and makes the belt look like an afterthought; leave roughly 5 to 7 cm of cuff visible when the sleeve underneath has a neat finish.
Check the weather honestly
Think like a comparison analyst: a coat has no AM Best rating or J.D. Power score, so judge its real coverage by fabric, lining, closure, and length, while your local climate matters just as much as your wardrobe; premiums vary by state and individual factors, and your trench needs vary by wind, rain, walking time, and indoor heating rather than by a generic seasonal label.
Use this fit test before styling the coat

Three-minute mirror test
Wear the thickest layer you expect to use and run this test before deciding on accessories or color.
| Check | Pass standard | Why it matters |
|---|---|---|
| Shoulders | Seam sits close to the shoulder edge without folding | Prevents a stiff, boxy outline |
| Back | You can pinch 2 to 4 cm of fabric without strain | Leaves room for a knit layer |
| Arms | You can cross your arms and raise them to chest height | Tests movement during commuting |
| Hem | Falls between mid-thigh and mid-calf | Balances trousers, skirts, and boots |
| Belt | Closes at the natural waist without digging in | Creates shape without bunching |
Fix the common proportion errors
A trench that ends at the widest part of the calf can make the legs look shorter, especially with flat shoes. A mid-thigh coat works with wide-leg trousers and sneakers, while a longer coat looks sharper with a narrow boot or a shoe with a small heel. If the coat has epaulettes, storm flaps, and large buttons, keep the rest of the outfit quiet; a plain knit and solid trousers let the construction do the work.
Do not size up just to fit one heavy jumper. If the shoulders drop more than about 2 cm past your natural shoulder line, the coat will look borrowed rather than relaxed. A better winter solution is a thinner thermal layer under a medium-weight sweater. The result stays warm without turning the waist and sleeves into one large block.
Five layering rules solve most autumn-to-winter mistakes
Rule 1: Match the fabric to the temperature
For mild autumn days, use cotton, poplin, silk, or fine merino beneath the trench. As temperatures fall, add a thin heat-retaining base layer before reaching for a bulky wool sweater. The trench blocks some wind, but a classic cotton shell is not a substitute for an insulated coat in freezing weather.
Rule 2: Use texture to make neutral colors look intentional
Combine smooth cotton with ribbed wool, brushed flannel, or softly grained leather. A camel trench over a charcoal ribbed knit looks richer than camel over several flat beige pieces. Keep the palette to two neutrals and one accent color, such as camel, black, and burgundy, so the outfit has a clear visual order.
Rule 3: Treat the belt as a styling tool
Tie the belt in a loose knot when walking, buckle it when you need wind protection, or leave it open over a structured outfit. Never let the belt hang unevenly at the sides. If the coat is double-breasted, closing every button can make the torso appear wider; fastening the waist button and leaving the top open often gives a cleaner line.
Rule 4: Protect the feet first
Winter style falls apart when the shoes are too delicate for the route. Choose leather ankle boots, lug-soled loafers, or water-resistant sneakers for wet pavements. Match the shoe weight to the coat length: a long trench needs a grounded shoe, while a short trench can handle a lighter trainer.
Rule 5: Know when not to wear a trench
Skip a traditional trench during heavy snow, freezing rain, or long periods below 5°C unless it has substantial insulation and a high collar. A padded parka or wool coat will keep you warmer. The trench wins for transitional weather, light rain, office commutes, and layered city dressing; forcing it into severe weather is a wardrobe mistake, not a style challenge.
Choose the coat by climate and budget, not the label

The strongest value pick for mild, wet commutes
For a controlled budget, my pick is the Uniqlo Trench Coat at about $129.90 on the US site. Its appeal is practical: a familiar double-breasted shape, recycled-material construction, and a price low enough to leave room for a wool sweater and weather-ready shoes. Style it with a grey merino knit, dark straight-leg jeans, and black ankle boots. This is the right choice for someone who wants one reliable autumn coat and does not need heavy insulation.
The sharper option for a modern capsule wardrobe
The COS Check-detail belted cotton trench coat is listed around $399 in the US, making it a design purchase rather than a basic one. Choose it when the cut matters more than the lowest price. Keep the outfit simple: cream knit, black trousers, and a compact leather bag. For a lower spend with a longer, traditional shape, the Mango Long double-breasted trench coat has appeared around $179.99 on the US site. The Mango coat is my better pick for trend-conscious shoppers who want more structure than a casual jacket without paying designer prices.
| Coat | Listed price | Best use | Trade-off |
|---|---|---|---|
| Uniqlo Trench Coat | About $129.90 | Everyday autumn commuting | Limited warmth in severe winter |
| Mango Long double-breasted trench coat | About $179.99 | Longer, polished city outfits | Check sleeve and hem length carefully |
| COS Check-detail belted cotton trench coat | About $399 | Modern capsule wardrobe | Higher cost for design details |
Prices can change by country, size, promotion, and stock status. The consumer-safe rule is simple: spend more on cut and fabric only when you will wear the coat often enough to justify it.
Which trench coat outfit works for your day?

How should you style a trench coat for work?
Wear a fine knit, a tucked shirt, straight trousers, and a closed trench with the belt tied at the back. This keeps the front clean while the waist still has shape. Choose black, navy, grey, or camel when the coat must work with several office outfits. The COS option earns its higher price here because a sharper cut can replace a blazer on mild days, but the Uniqlo coat gives the stronger value if you already own tailored trousers and polished shoes.
How do you style a trench coat casually?
Use a sweatshirt or striped knit, relaxed jeans, and clean leather sneakers. Push the sleeves slightly to show the cuff, then leave the trench open so the casual layer remains visible. The Mango long coat works well with this formula because the longer hem gives basic denim a more deliberate shape. Avoid pairing a very oversized hoodie with a very loose trench; choose one relaxed item and keep the other close to the body.
What should you wear with a trench coat in winter?
For cold days, add a thin thermal top, a fine wool turtleneck, opaque tights or warm trousers, and ankle boots. Fasten the coat at the waist and add a wool scarf inside the collar to reduce drafts. If you still feel cold after adding those layers, switch to an insulated coat. The final test is the same as the opening scenario: you should be able to walk outside, move your arms, and arrive warm without the coat fighting your outfit. For mild rain and changing autumn temperatures, the Uniqlo Trench Coat is the clear value choice; for a sharper wardrobe with frequent wear, the COS coat is the stronger style investment.

Lifestyle Reset: Creating a Calm Home Corner for Evenings
At 8:40 p.m., you finish work, drop your bag on the floor, leave two cups beside the sofa, and open your phone to unwind. Forty minutes later, the room feels louder than before. The common mistake is blaming the room size. A calm home corner does not require a spare room, expensive furniture, or a perfect minimalist apartment. It needs one visible area with fewer decisions, softer sensory input, and a short routine you can repeat when you are tired.
The goal is not to make your home look staged. The goal is to make the first ten minutes after work easier.
Choose the corner by friction, not square footage
The 10-minute site test
Walk through your home at the time you usually want to relax. Do not choose the prettiest corner in daylight. Choose the spot that already sits near the action you want to repeat: reading, stretching, skincare, tea, journaling, or quiet music. A corner beside the sofa may win because the lamp and outlet are already there. A windowsill may look lovely but fail if it faces a busy road and stays cold after sunset.
Stand in each possible spot for two minutes. Notice what makes you get up. Is the charger across the room? Is the overhead light directly above your eyes? Do laundry piles sit in your line of sight? These small annoyances create friction before the routine even starts.
Compare the three practical locations
| Location | Best use | Common problem | Fix |
|---|---|---|---|
| Living-room corner | Reading, tea, music | TV remains visible | Turn the chair 45 degrees away from the screen |
| Bedroom corner | Skincare, stretching, quiet | Work follows you into bed | Keep the desk outside the reset zone |
| Window or balcony edge | Breathing space, journaling | Cold air and street noise | Add a rug, curtain, and warm layer |
My verdict on placement
For most homes, the best calm corner is within three steps of your usual seat and within reach of a power outlet. Convenience beats visual drama. If the routine requires crossing the room twice, you will skip it on the nights when you need it most.
Soft light beats a beautiful room
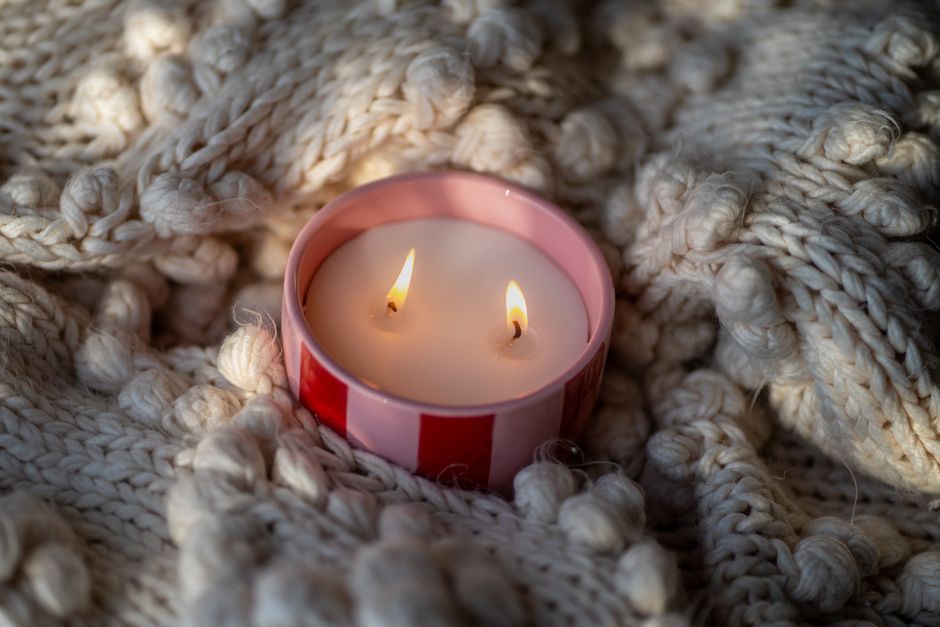
Change the light before you change the furniture. A room can contain a beautiful chair, clean shelves, and expensive candles, yet still feel harsh under one bright ceiling fixture; the fastest improvement is to move your evening light source lower than eye level, aim it at a wall or nearby surface, and keep the color warm enough that the room stops feeling like a workplace.
The best target is roughly 2200K to 3000K for the evening, with enough brightness to read without squinting but not enough to flood the whole room; the Philips Hue White Ambiance A19 gives you 800 lumens and an adjustable range of 2200K to 6500K, so it is useful if you want one bulb for work and winding down, but the calm setting is the warm end of that range, not the bright white setting.
Do not place the lamp behind your head because it will throw shadows onto a book or skincare mirror; place it beside the chair, about 60 to 90 centimetres from your shoulder, and angle it toward the wall or floor so the light spreads without hitting your eyes directly.
My clear recommendation is simple: use one warm side lamp, turn off the ceiling light, and keep the corner dimmer than the rest of the home; a perfect interior with bad lighting still feels restless, while a plain chair beside a soft lamp can feel finished in five minutes.
Use a five-step reset instead of decorating forever

A calm corner becomes useful when it tells you what to do next. Keep the sequence short enough to follow on a bad evening. This five-minute reset works because it clears the space, changes the sensory setting, and gives your body one obvious landing point.
- Clear one surface. Move cups, packaging, chargers, and work papers into their proper homes or one temporary basket. Do not start cleaning the entire room. The corner only needs one clear surface.
- Change the light. Turn off the overhead fixture and switch on the warm lamp. If the room still feels bright, lower the lamp or point it toward a wall instead of lowering your phone brightness and calling the problem solved.
- Set a 20-minute activity. Pick one action before you sit down: read six pages, stretch for ten minutes, remove makeup, write three lines, or drink tea without scrolling. A vague plan invites your phone to take over.
- Place the phone outside arm’s reach. Put it on a shelf or table at least one metre away. Keep the ringer on if you need to receive calls, but remove the easy thumb habit.
- Stop while the corner still feels good. Leave the mug, book, or mat ready for the next evening, then walk away before the routine becomes another chore.
Use the same order for seven nights. Do not keep redesigning the setup. The point is to make the first action automatic, not to create a new home project.
Which small upgrades earn their place?
Buy the item that removes a repeated problem, not the item that photographs well. A calm home corner needs very little equipment, and most decorative purchases solve nothing after the first week.
| Product | Useful specification | Typical US price | Verdict |
|---|---|---|---|
| Philips Hue White Ambiance A19 | 800 lumens, 2200K–6500K adjustable white light | About $25 | Best lighting upgrade for one room |
| IKEA POÄNG armchair | High-back frame, washable cushion options, about 68 cm wide | About $100–$180 | Best affordable reading seat |
| Levoit Core 300S | True HEPA filter, 219 sq. ft. room rating, sleep mode | About $150 | Useful for dust or stale air, not mood alone |
| Sony WH-1000XM5 | Noise cancellation, up to 30 hours of battery life | About $400 | Best for shared or noisy homes |
Choose the Philips bulb first if the room feels harsh. Choose the IKEA POÄNG if your current seat makes reading uncomfortable. Choose the Levoit Core 300S only if dust, pet dander, or stale air keeps interrupting the evening; an air purifier will not fix clutter or a bright ceiling light. Choose the Sony headphones only when sound is the problem you can name.
The strongest setup is often a $25 bulb, a clear side table, and a phone placed out of reach. Spending $700 on a chair, purifier, lamp, and sound system can create a more expensive clutter zone if the routine itself remains vague.
Questions that expose a weak evening corner

Do I need a separate room?
No. You need a visual boundary, not a wall. A chair turned away from the television, a small rug, or a lamp that marks one area can tell your brain that this spot has a different job. In a studio apartment, use the end of a sofa or one side of the bed, but keep work equipment outside the marked area. If your desk is the only available surface, cover the monitor or close the laptop before the reset begins.
Should I add scent?
Only if scent already feels pleasant and safe for you. A candle, essential-oil diffuser, or room spray can become another source of irritation, especially for people with migraines, asthma, pets, or scent-sensitive housemates. Start with no fragrance. Add one mild scent later if the room feels flat rather than calm. Never use scent to cover dampness, dirty fabric, or poor ventilation.
When should I skip the expensive upgrade?
Skip it when the problem is behavioral or structural. Do not buy a smart lamp if you still leave the ceiling light on because the switch is inconvenient. Do not buy noise-canceling headphones if the television is loud because nobody has agreed on a quiet hour. Do not buy an air purifier to solve a pile of laundry. Fix the repeated obstacle first, then spend money on the tool that removes what remains.
Mistakes that turn calm corners into clutter zones
Do not give the corner too many jobs
A reading chair that also stores handbags, folds laundry, charges three devices, and holds tomorrow’s outfit is not a calm corner. It is a drop zone with better lighting. Give the area one main purpose and one backup purpose. Reading plus tea works. Reading plus remote work plus storage plus exercise equipment does not.
Do not make the reset depend on motivation
If you need to remember six steps, find a playlist, fill a diffuser, adjust three lights, and choose a journal prompt before sitting down, the routine is too fragile. Keep the lamp switched off until evening, leave the book on the table, and use a simple timer. The fewer decisions between entering the room and starting, the more often the routine will happen.
Do not mistake emptiness for calm
A bare corner can feel cold, unfinished, or hard to use. Keep one soft texture, one practical light, and one object with a clear purpose. Remove anything that creates maintenance: delicate plants you forget to water, open shelves that collect dust, and decorative trays that invite small objects to multiply.
After one week, judge the corner by behavior. Are you sitting there without opening your phone? Does the light make your shoulders drop? Can you reset the space in under two minutes? If the answer is no, remove one item or shorten the routine. Calm comes from fewer obstacles repeated every evening, not from a room that looks perfect for one photograph.

Easy Skincare Steps Before Makeup in Winter
Winter makeup does not fail because your foundation suddenly became bad. It fails when cold air, indoor heat, hot water, and rushed skincare leave the surface of your skin rougher than usual. The fix is not a ten-step routine. You need the right order, smaller amounts, and enough time for each layer to settle.
This routine targets tightness, dry patches, flaky cheeks, and makeup that separates around the nose. It also explains which products earn a place on your shelf and which popular winter additions can make makeup slide or pill.
The 5-Minute Winter Prep Routine That Prevents Flakes

The best routine is five minutes of calm, thin layers. Rushing creates more pilling than most product formulas do, because fingers keep moving partly settled skincare around the face.
Steps 1 to 3: Clean, soften, and seal
- Cleanse with lukewarm water. Use a gentle cleanser if you woke up sweaty or wore a heavy night cream. If your face feels comfortable and clean, rinse with water instead of cleansing again.
- Pat until the skin is slightly damp, not dripping. Apply a small amount of hydrating lotion or serum only to areas that feel tight. One or two pumps is enough for the whole face.
- Press moisturizer over the cheeks, around the mouth, and beside the nose. Use less on the forehead and chin if those areas become shiny. Keep the layer thin enough that it disappears within one minute.
Steps 4 and 5: Protect and pause
- Apply broad-spectrum sunscreen in two light passes instead of one thick, messy layer. Give it at least five minutes before makeup. Sunscreen belongs in the morning routine even on cloudy winter days because ultraviolet exposure does not stop when the temperature drops.
- Press a clean tissue over extra shine, then apply primer only where makeup needs help. Do not spread primer across a wet or greasy face. Use a damp sponge or clean fingers and tap foundation over the skin instead of dragging it.
Wait longer when the products feel slippery. A short pause is not wasted time; it prevents the moisturizer, sunscreen, primer, and foundation from mixing into one uneven film. If flakes still show, add a tiny amount of moisturizer to that spot, wait again, and tap makeup over it. Do not scrub the patch away in the middle of getting ready.
Which Winter Prep Products Are Worth Buying?
Best overall buy for dry, sensitive skin: Vanicream Daily Facial Moisturizer. It has a lighter feel than a thick body cream, includes squalane and hyaluronic acid, and usually costs about $13 for 3 ounces. Prices vary by retailer in 2026, so treat these figures as typical U.S. shelf prices rather than fixed prices.
Best moisturizers and cleansers for a dry winter face
| Product | Size and typical price | Best use before makeup | Verdict |
|---|---|---|---|
| CeraVe Hydrating Facial Cleanser | 12 fl oz, about $15 | Gentle morning cleansing without a tight finish | Best cleanser for normal to dry skin |
| Vanicream Daily Facial Moisturizer | 3 fl oz, about $13 | Light barrier support for sensitive skin | Best value for dry or reactive skin |
| La Roche-Posay Toleriane Double Repair Face Moisturizer | 3.375 fl oz, about $24 | Ceramide, glycerin, and niacinamide support under foundation | Best premium daily moisturizer |
CeraVe Hydrating Facial Cleanser is the safest starting point when your face feels stripped after washing. La Roche-Posay Toleriane Double Repair Face Moisturizer is the stronger pick when indoor heat leaves your cheeks rough by midday. Vanicream wins on price and a short ingredient list, making it the most practical choice for people who react to fragrance.
Best sunscreen and primer for smooth makeup
Beauty of Joseon Relief Sun: Rice + Probiotics SPF50+ PA++++ costs about $18 for 50 milliliters and has a lotion-like texture that works well under light foundation. For primer, e.l.f. Power Grip Primer costs about $10 for 0.811 ounces and gives makeup more hold, but it can grab dry flakes if you apply it before the moisturizer settles. The winning combination is Beauty of Joseon for a comfortable sunscreen layer and e.l.f. only on the nose, around the mouth, or other areas where makeup fades first.
Winter Makeup Prep Questions, Answered

Most winter prep mistakes come from adding the wrong step, not from missing an expensive product.
Should I exfoliate flaky skin before makeup?
No. Skip physical scrubs and strong exfoliating acids before an event. Flaking often signals a weak, irritated surface, and scrubbing can create redness that foundation cannot hide. Use a gentle cleanser, moisturizer, and a damp cotton pad only if loose flakes lift without pressure. If you exfoliate regularly, schedule that step for a different evening. The CeraVe Hydrating Facial Cleanser and Vanicream Daily Facial Moisturizer are a better same-morning pairing than an exfoliating toner followed by a thick cream.
Should I use facial oil under foundation?
Usually not. Facial oil can help very dry skin at night, but it may make sunscreen and foundation slide during the day. Try a richer moisturizer first. If one cheek still feels rough, press one drop of oil onto that small area and wait at least 10 minutes before sunscreen. Do not spread oil across the whole face unless you have tested the combination with your foundation. For most people, La Roche-Posay Toleriane Double Repair Face Moisturizer gives enough comfort without the extra slip.
Why does my makeup pill after winter skincare?
Pilling usually comes from too much product, too much rubbing, or layers that do not have time to settle. Reduce every layer by half, wait five minutes after sunscreen, and tap instead of massage. If the problem continues, remove primer from the routine for one day. Many people discover that moisturizer plus sunscreen already gives them a smoother base. Add e.l.f. Power Grip Primer back only where makeup actually fades, not as a full-face reflex.
My Clear Verdict: Use Less, Wait Longer
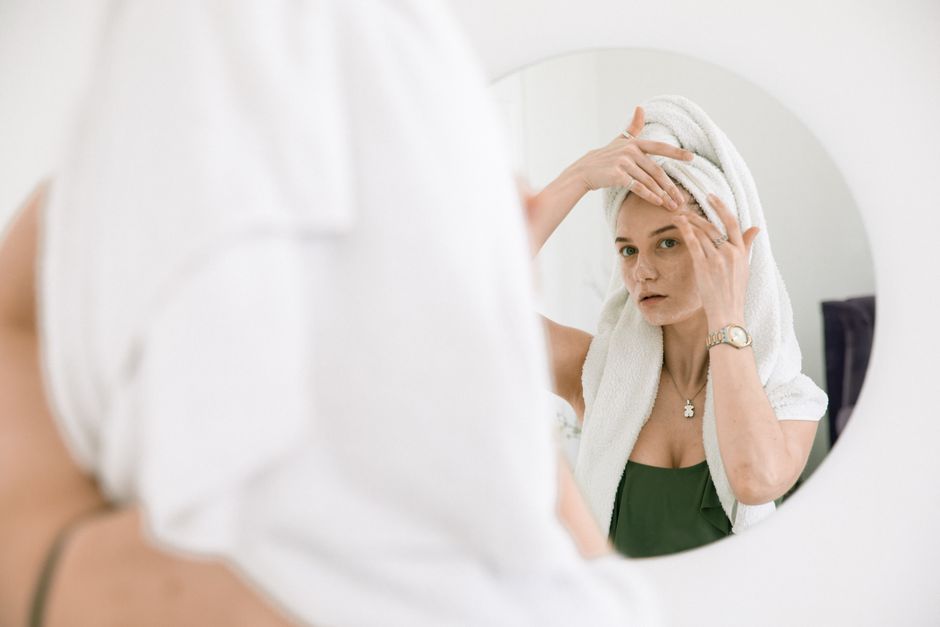
For most winter mornings, the winning routine is a gentle cleanse, one dependable moisturizer, sunscreen, and a targeted primer. More layers do not equal more hydration. They create more chances for pilling, shine, and uneven foundation. CeraVe Hydrating Facial Cleanser is the best starting cleanser, Vanicream Daily Facial Moisturizer is the best budget moisturizer for sensitive skin, and Beauty of Joseon Relief Sun is the best sunscreen pick when you want a comfortable lotion texture under makeup. Choose La Roche-Posay Toleriane Double Repair instead of Vanicream when your cheeks need more cushion, and skip e.l.f. Power Grip Primer unless your base truly needs extra hold.
Best routine by skin type
- Dry or sensitive skin: rinse or use CeraVe Hydrating Facial Cleanser, apply Vanicream Daily Facial Moisturizer, wait five minutes, then use sunscreen and a small amount of foundation.
- Very dry cheeks: use La Roche-Posay Toleriane Double Repair on the cheeks, keep the forehead layer thin, and avoid facial oil under the full makeup base.
- Combination skin: moisturize the cheeks normally, use less on the forehead, and apply e.l.f. Power Grip Primer only around the nose or mouth.
- Flaky or irritated skin: skip exfoliation, fragrance-heavy products, and extra primer until the surface feels comfortable again.
Final comparison
The right choice is the one that leaves your skin comfortable, not glossy or sticky. Start with the shortest routine that solves the problem, then add only the product that fixes a specific makeup issue.
| Winter concern | Best choice | What to avoid |
|---|---|---|
| Tight skin after cleansing | CeraVe Hydrating Facial Cleanser | Hot water and foaming cleanser |
| Dry, sensitive cheeks | Vanicream Daily Facial Moisturizer | Fragrance and heavy scrubbing |
| Rough patches under foundation | La Roche-Posay Toleriane Double Repair | Adding several serums at once |
| Makeup fading around the nose | e.l.f. Power Grip Primer in a small area | Full-face primer over wet moisturizer |
| Comfortable daytime protection | Beauty of Joseon Relief Sun SPF50+ | Skipping sunscreen because it is cold |

Cozy Fashion Staples for Cold Months: Fabrics Worth Buying
Wool is the best cold-weather fabric for most wardrobes because it insulates when damp, resists odor, and works across thin base layers and heavy coats. Cashmere feels softer but needs gentler care. Fleece gives reliable warmth at a lower cost, while cotton belongs closest to dry indoor spaces rather than wet winter weather. This is not legal advice — consult a licensed attorney.
Which fabrics actually keep you warm?
The best cozy fashion staples solve one basic problem: they slow the loss of body heat while letting moisture move away from the skin. A thick garment is not automatically a warm one. A loose cotton sweatshirt can feel bulky yet turn cold after it absorbs sweat. A fine merino layer can feel light and stay comfortable during a long walk because wool fibers trap small pockets of air and handle moisture better.
Why wool earns the top spot
Wool has a useful mix of insulation, breathability, and resilience. Merino fibers are finer than many traditional wool fibers, so they feel smoother against the skin. A 150 to 200 g/m² merino base layer suits active indoor-to-outdoor wear, while a 250 to 300 g/m² layer gives more warmth for slow walks and cold commutes. The UNIQLO Extra Fine Merino Crew Neck Sweater is a practical example of a thin 100% merino wool layer. It works under a blazer, coat, or vest without creating much bulk.
Wool also handles small amounts of moisture better than cotton. Its fibers can absorb vapor while still feeling relatively dry, and the material often resists odor longer between washes. That does not make wool self-cleaning. Air the garment after use and wash it according to the care label.
When cashmere or fleece makes more sense
Cashmere wins on softness and low weight, not on ruggedness. The Quince Mongolian Cashmere Crewneck, identified as 100% cashmere, suits a dry office or a layered dinner outfit. It is a poor choice for a backpack strap, rough outerwear, or frequent machine washing. Cashmere fibers can pill when they rub against bags, seat belts, and coarse coats.
Fleece is the stronger choice for active use and easy care. The Patagonia Better Sweater Jacket uses 100% recycled polyester fleece in a knit-style construction, giving it a sweater-like look with synthetic-fleece performance. For a person walking a dog, traveling, or washing clothes often, fleece is the clear practical winner. For one refined sweater that feels soft against bare skin, cashmere wins. For the broadest use, merino wool remains the best buy.
How do wool, cashmere, fleece, and cotton compare?

The clearest way to choose a winter fabric is to compare its behavior, not its reputation. The table below gives a useful starting point for ordinary cold-month clothing.
| Fabric | Warmth | Moisture handling | Durability | Best use |
|---|---|---|---|---|
| Merino wool | High for its weight | Good | Good with careful washing | Base layers, sweaters, travel |
| Traditional wool | High | Good | Very good | Coats, trousers, structured jackets |
| Cashmere | High for its weight | Moderate | Moderate | Soft sweaters and dressier layers |
| Fleece | Moderate to high | Dries quickly | High | Outdoor activity and casual layers |
| Cotton | Low when damp | Absorbs moisture slowly to dry | High | Dry indoor wear and light layering |
| Down | Very high for its weight | Weak when wet | Moderate with proper care | Insulated coats and cold, dry weather |
The verdict is simple: choose merino for the most balanced everyday layer, fleece for repeated active use, cashmere for softness, and traditional wool for a coat that must hold its shape. Cotton is not useless, but it should sit below a warmer layer or stay indoors. Down remains the warmest light option in dry weather, yet it needs a shell that blocks wind and moisture.
Fiber content still matters. A sweater labeled wool blend might contain only 20% wool and a large amount of acrylic or polyester. That can lower cost and improve durability, but it may also reduce breathability and change the way the garment feels. Read the percentage breakdown before treating a garment as a true wool, cashmere, or cotton staple.
How should you build a warm fabric system?
Do not start by buying the thickest sweater in the shop. Build warmth in layers so each piece has a job.
- Start with a moisture-friendly base layer. Choose merino wool or a lightweight synthetic fabric in a close but not tight fit. For ordinary commuting, 150 to 200 g/m² is enough. A base layer that wrinkles, bunches, or restricts movement will feel colder because it creates pressure points and gaps.
- Add an insulating middle layer. Use a wool sweater, fleece jacket, or quilted vest. The middle layer should trap air without compressing the base layer. Compression reduces the air pockets that provide insulation. A medium-weight fleece often works better than an oversized cotton hoodie for active outdoor use.
- Block wind with the outer layer. Wool insulates, but a windy coat can strip heat from the surface. Add a tightly woven coat, wind-resistant jacket, or shell. The outer garment should cover the lower back and leave enough room for the middle layer.
- Protect the heat-loss points. A warm torso cannot fully compensate for cold hands, feet, neck, and ears. Wool socks, lined gloves, and a close-fitting hat can improve comfort more than replacing a medium sweater with a very thick one.
- Match the system to activity. Slow sightseeing needs more insulation than a fast walk. During exercise, remove a layer before sweat builds up. Damp clothing can make the return trip uncomfortable even if the outfit felt warm at the start.
- Wash less and dry correctly. Air wool and cashmere after short wear. Use a mesh bag and a gentle cycle only when the label allows it. Lay knitwear flat to dry because hanging wet wool can stretch the shoulders and change the fit.
The strongest system is not the one with the most fabric. It is the one that keeps the skin reasonably dry, traps air, and blocks wind without making movement difficult.
Which fabric is right for common winter situations?

What should you wear for a cold commute?
Choose a merino base layer, a wool or fleece middle layer, and a wind-blocking coat. This combination handles temperature changes better than one heavy cotton sweatshirt. Merino is the best single fabric for a commute because it remains comfortable on a crowded train, under a coat, and during a short walk outside.
What works best for sensitive skin?
Choose fine merino, cashmere, or a smooth cotton layer against the body, then place rougher wool on top. A fabric label does not guarantee comfort. Fiber diameter, seams, dyes, and finishing treatments all affect how a garment feels. If a sample scratches after several minutes, a base layer will not magically make it comfortable.
When should you avoid cashmere?
Avoid cashmere for rough daily work, heavy backpacks, frequent travel, or a routine that requires hot washing. Buy fleece or a durable wool blend instead. Cashmere makes sense when softness, low weight, and a polished appearance matter more than hard wear. It is a luxury layer, not the best universal workhorse.
Is cotton ever a smart winter choice?
Yes, when the garment will stay dry and mostly indoors. A cotton turtleneck under a wool blazer can look polished and feel comfortable in a heated office. Cotton becomes the wrong choice during long outdoor exposure, rain, or high-output exercise because it holds moisture near the skin.
For one dependable cold-month wardrobe, buy merino first, add fleece for active days, and reserve cashmere for low-friction outfits. That order gives the best balance of warmth, care, and cost.
What cold-weather fabric mistakes should you avoid?

The most common mistake is treating softness as proof of warmth. Acrylic can feel soft, cotton can feel substantial, and a thin wool sweater can feel light, yet their performance changes sharply in wind and moisture. Check the fiber content and garment construction before judging the fabric by touch.
Mistake 1: Buying a thick cotton layer for wet weather
A heavy cotton hoodie may feel warm when dry, but it absorbs sweat and takes longer to dry than fleece or many synthetic layers. For wet commutes, choose a moisture-friendly base and a wind-resistant outer layer. Keep cotton for the indoor portion of the day.
Mistake 2: Choosing a delicate knit for a hard-wearing job
The Quince Mongolian Cashmere Crewneck can suit a quiet office wardrobe, but it is not the right partner for a rough shoulder bag or daily outdoor labor. Pilling, stretching, and snags are predictable results of friction. A compact merino sweater or the Patagonia Better Sweater Jacket is the better choice when the garment will face repeated abrasion.
Mistake 3: Ignoring fit and garment density
An oversized opening at the neck, short sleeves, or a cropped hem can leak heat even when the fabric is excellent. Check sleeve length, cuff tension, hem coverage, and room for one additional layer. For coats, look for a dense weave and enough space to move your arms without compressing the sweater underneath.
The final mistake is overbuying. Most people need one reliable merino layer, one durable fleece or wool middle layer, and one wind-blocking coat before they need a fifth sweater. On a cold morning, that small system solves the real problem: dry insulation protected from wind. The result is warmer, easier to care for, and more useful than a closet full of attractive fabrics chosen without a job in mind.